Since the old one was nuked with the old forums, here we go!
Disclaimer: IF YOU HAVE A POTATO PC, I CANNOT HELP YOU. YOU JUST CAN'T STREAM :(
So you want to stream Hawken? Well here's a guide for those of you new to streaming or are interested in doing so. First we're going to look at computer and network specs because these are the most important parts of streaming! No one wants to watch a stream with dropping frames or one that looks like a potato!
My current specs:
Processor: i7 [email protected] quad core
Memory: 12GB DDR3
Graphics Card: 7970 GHz edition
Upload speed: I use testmy.net since it's a lot more accurate than speedtest.
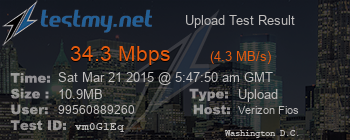
In game settings: 1920x1080 low Graphics, Ultra textures with consistent 60+fps while streaming 720p 60fps on twitch.
My net allows me to use a liberal amount of upload bandwidth without causing any ping increases in-game.
Most computers are capable of doing these kind of streams, but obviously the stronger, the better. I would consider my computer pretty mid range. If you have questions, you can post your specs to see if there's a problem. Just to let you know, your processor is usually the bottleneck while streaming. Why? Because every frame is encoded by your CPU, I will go into further detail later in the advanced section of the tutorial.
So we have a computer, big whoop, now let's get down to software we need to stream/record!
Open Broadcaster Software - This is an awesome free program which I use to stream. No one should have trouble with this.
XSplit - This is a very powerful streaming software as well with more features and better UI for setting up a scene, but at the cost of money to use them. There is a free version, but it's not as good as OBS' free version.
Sites to stream:
twitch.tv - This is the most popular place to stream video games as this will also be the site I will reference for this tutorial as it is the most popular by a landslide.
hitbox.tv - This was made by people who wanted an alternative to twitch. It allows basic users to have more options and even a cool quality control switch for those with worse internet.
Open Broadcaster Software (OBS) (use the 32-bit version, the 64-bit version can be buggy)
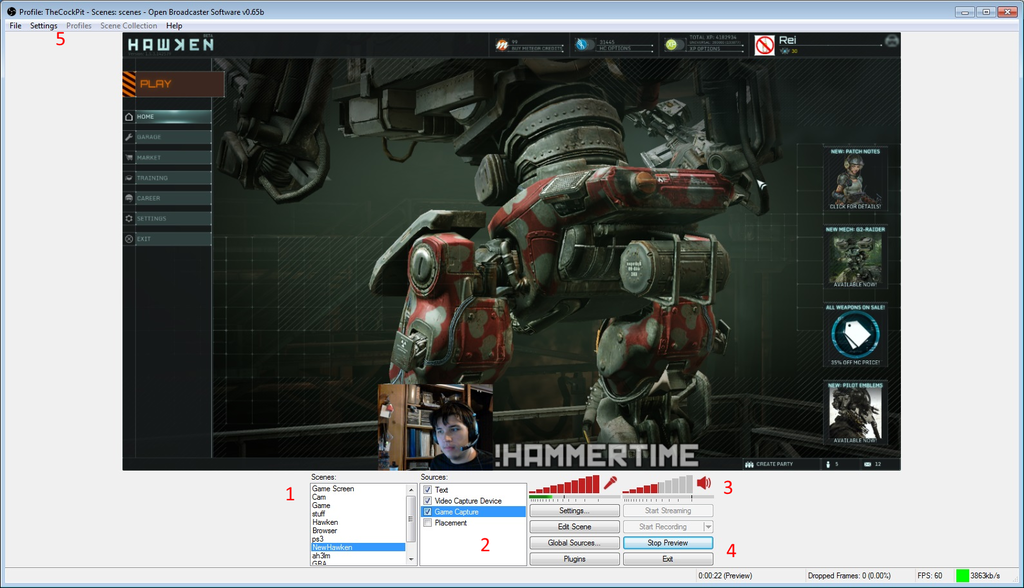
Let's get familiar with the UI of OBS first.
Click to see UI
1: Scenes - This is the entire scene that is broadcast to wherever you're streaming to. What you see in the preview is what they see. This is just a very basic screen I use with 3 active sources.
2: Sources - This is where you put in your text, camera, game screen and everything. They are ordered from top to bottom for what is on top of what.
3: Audio - This is where you can adjust the volume of your microphone and desktop sounds (what's coming through your headphones) for your viewers. So if people complain about you being too quiet, you can lower your desktop volume to compensate for your microphone.
4: Buttons - These are self explanatory.
5: Dropdown menus - These are also self explanatory.
Stream Settings
Let's go to the dropdown menus first, go to Settings > Settings
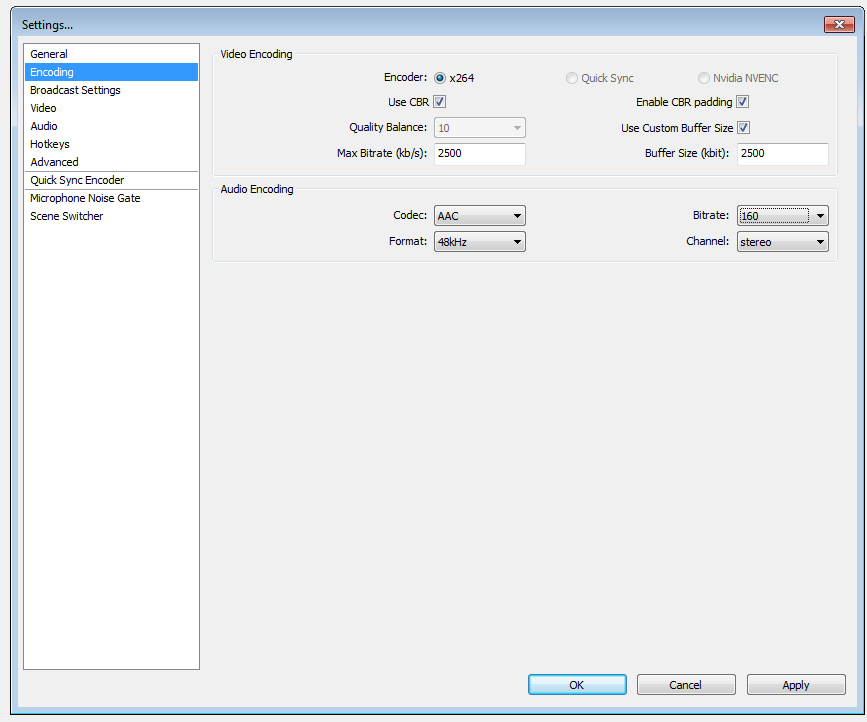
Click on Encoding
You're going to want to use CBR
Max Bitrate: you can put just about anything you want. Twitch will cap bitrate at 3500 kb/s for non-partnered users so there is no point in going above that. Obviously you don't want to put this higher than what your internet can handle, I would advise to do between 1000-2000 if your internet isn't the strongest. Also think of your viewers as well, some of them cannot handle high bandwidth streams, so keep that in mind.
Buffer Size: NOT 0, you can only run 0 if you are doing local recordings, but this needs to be something, you can usually get away with half your max bitrate up towards same as your max bitrate.
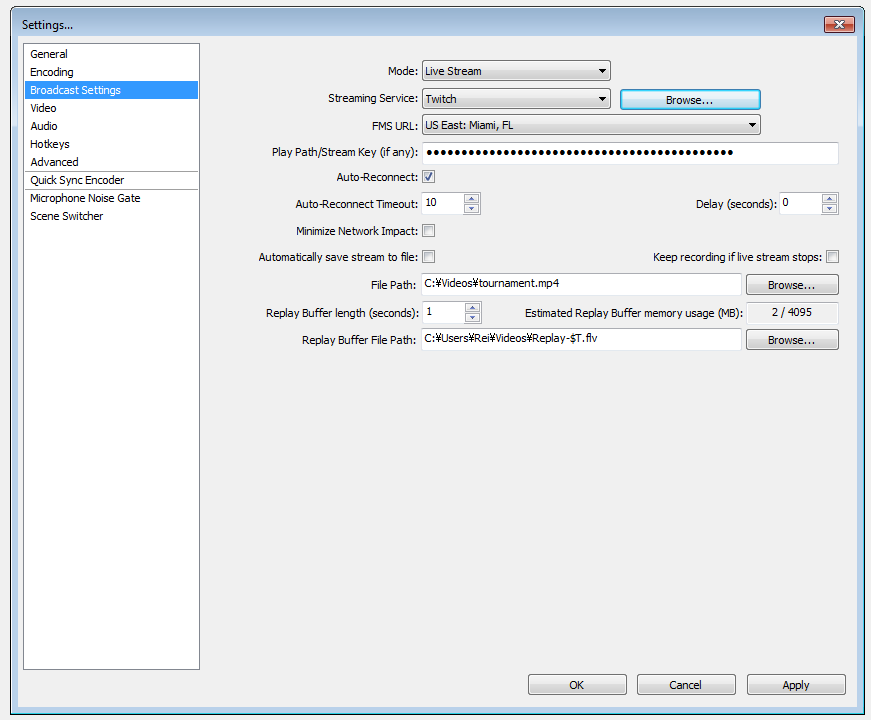
Click on Broadcast Settings
Mode: Live stream (if you're streaming, recording otherwise)
Streaming Service: Twitch (Or whatever you want to use, this is focused for twitch users)
FMS URL: Use the closest to your location. I use Miami because the servers in VA and NY can be a little weird at times.
Play Path/Stream Key (if any): go to twitch.tv/******/dashboard/streamkey where ****** is your account name. Click show key and copy/paste it into the box in OBS.
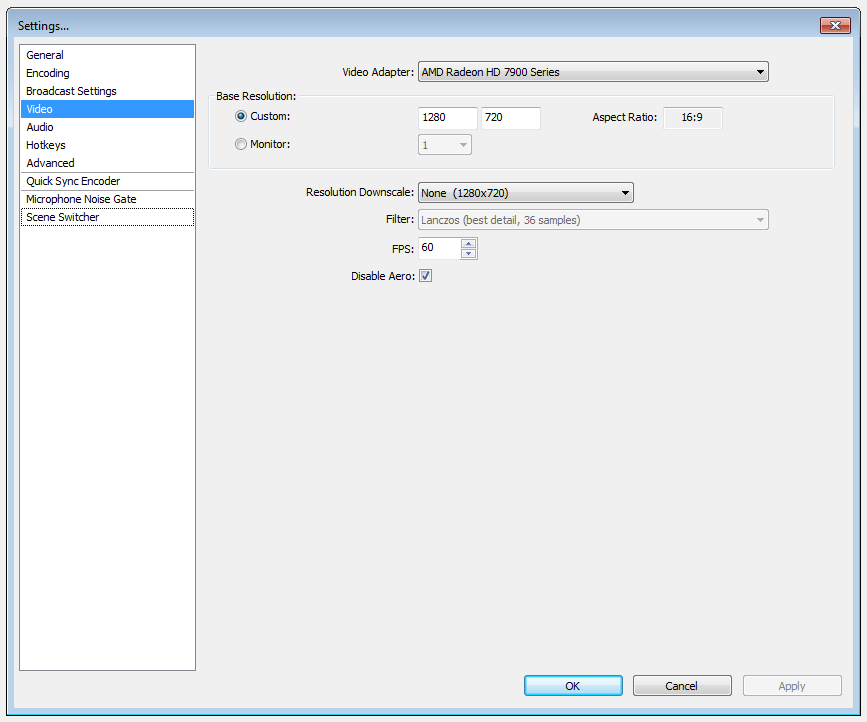
Click on Video
Base resolution: 1280x720/1920x1080 - 720p is the highest res you should be streaming at. Putting the stage at 1080p is fine too if you downscale. If you can't handle streaming 720p, you can lower this further. I would suggest keeping the Aspect ratio at 16:9 though.
Resolution Downscale: None/1.50 Choose 1.50 if you have your Base resolution at 1920x1080, this will change the output video to 720p
FPS: 30/60. Whichever you prefer. 30 is easier to stream, but 60 is a lot smoother.
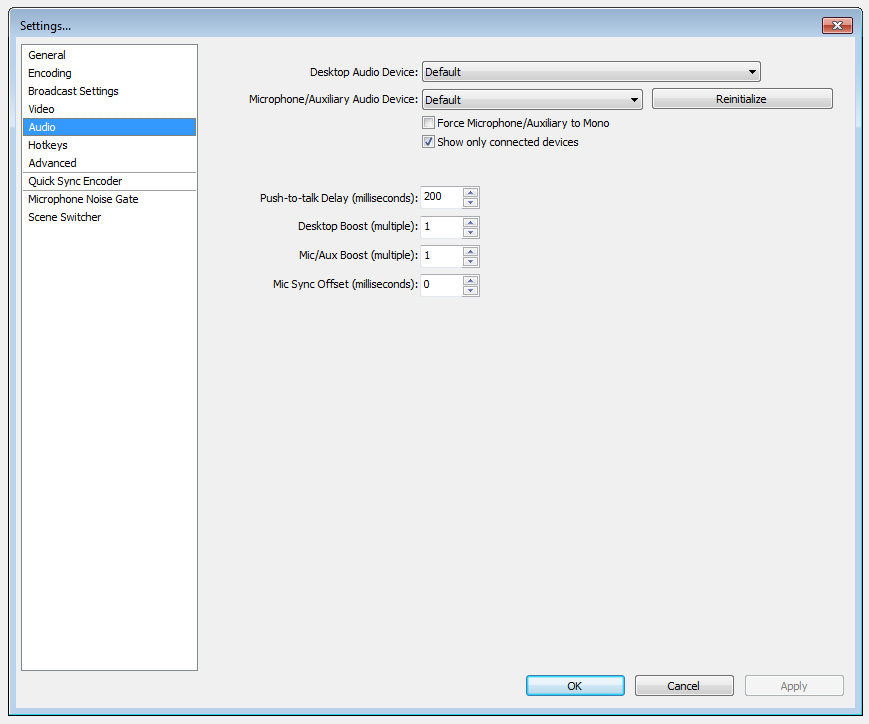
Click on Audio
Desktop Audio Device: Default is usually fine, usually it defaults to whatever goes to your headphones/speakers.
Microphone/Auxiliary Audio Device: Default is usually fine, usually just makes it your microphone. Sometimes puts in your webcam mic.
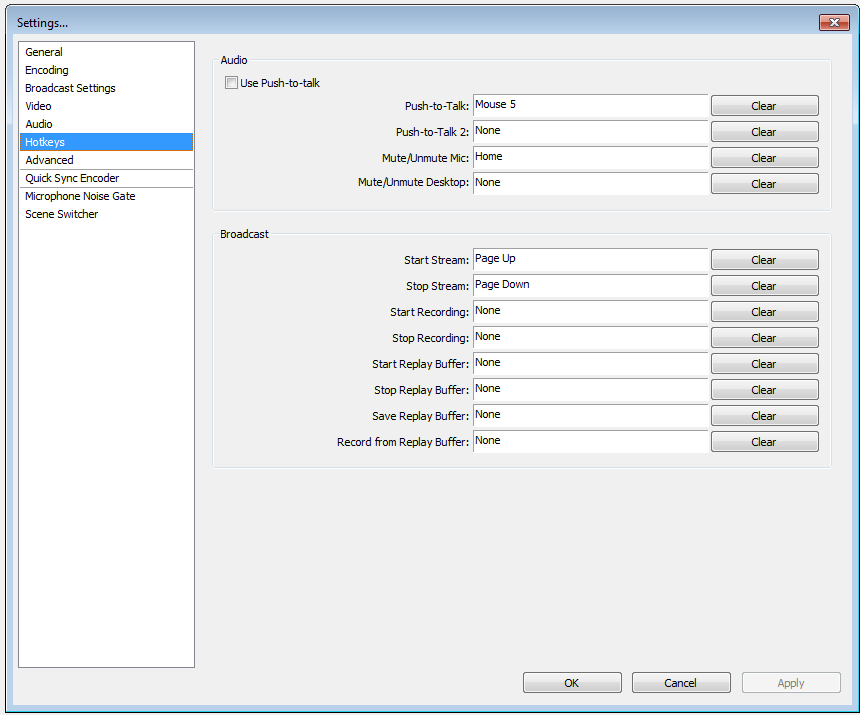
Click on Hotkeys
You don't have to do anything here. I like to set up start/stop hotkeys so I don't have to alt-tab to start or stop streaming.
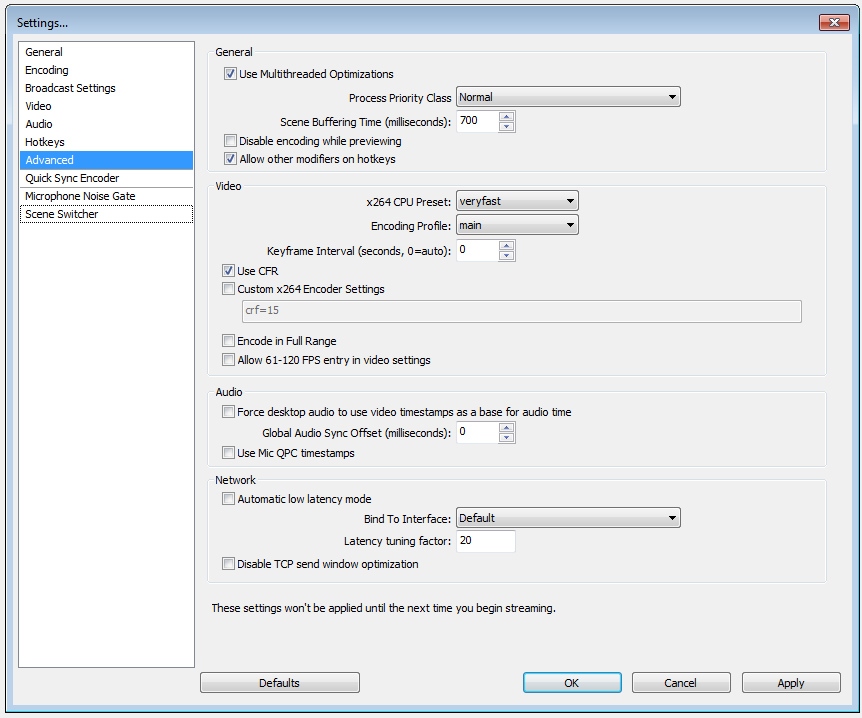
Click on Advanced
x264 CPU Preset: whatever you want (veryfast is default). - Remember when I said I will explain about encoding and your CPU? This is where your CPU does most of it's work. The slower the speed, the slower your computer will take to encode each frame and thus will look a LOT better. However, this is EXTREMELY taxing on your cpu, this is a great way to make up for having a bad upload rate if you have a ridiculous cpu since your frames will look better due to better encoding so you can lower bitrate. To really get the best picture out of your stream, you will lower this maybe a little, but not a whole lot. You can experiment with this yourself. I myself personally run veryfast since I have an older CPU.
Encoding profile: main (This is for twitch)
Alright save your settings and close it.
Making a Scene
I will start a blank scene so you can go step by step with me. You might want to open hawken up in the background first so OBS can detect it.
Right click inside the Scene box > Add Scene (name it w/e you want)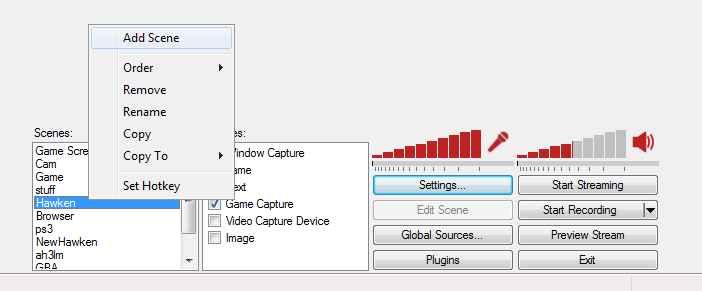
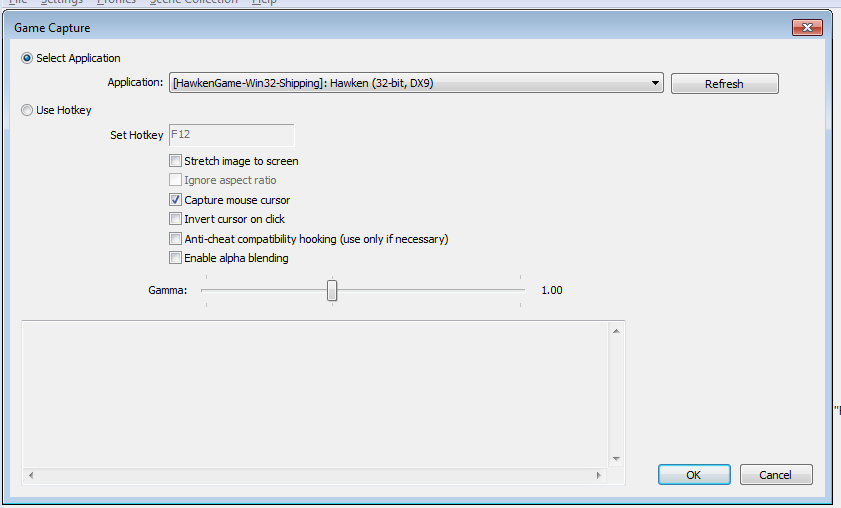
Right click inside sources > Add > Game capture
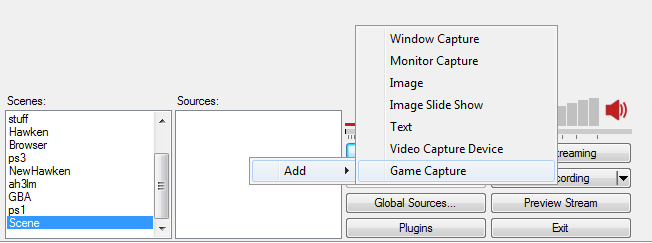
Application: HawkenGame-Win32-Shipping
Hit OK.
You're actually now ready to stream! You have a simple scene with your game footage, your audio should be set (volumes might have to be adjusted), your stream output and source should be set. You should be all good. Just go to your twitch dashboard, change your title and game and then hit Start Streaming and you should be good!
Adding a webcam
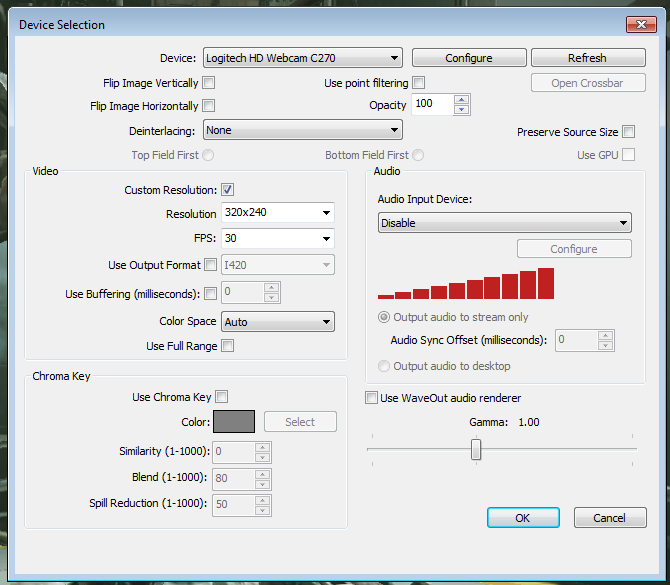
Right click inside sources > Add > Video Capture Device
Device: Select your webcam
Custom Resolution : checked. You're not going to want to have 480p+ webcams show the full size. Make it smaller at first before you start moving things.
Hit OK
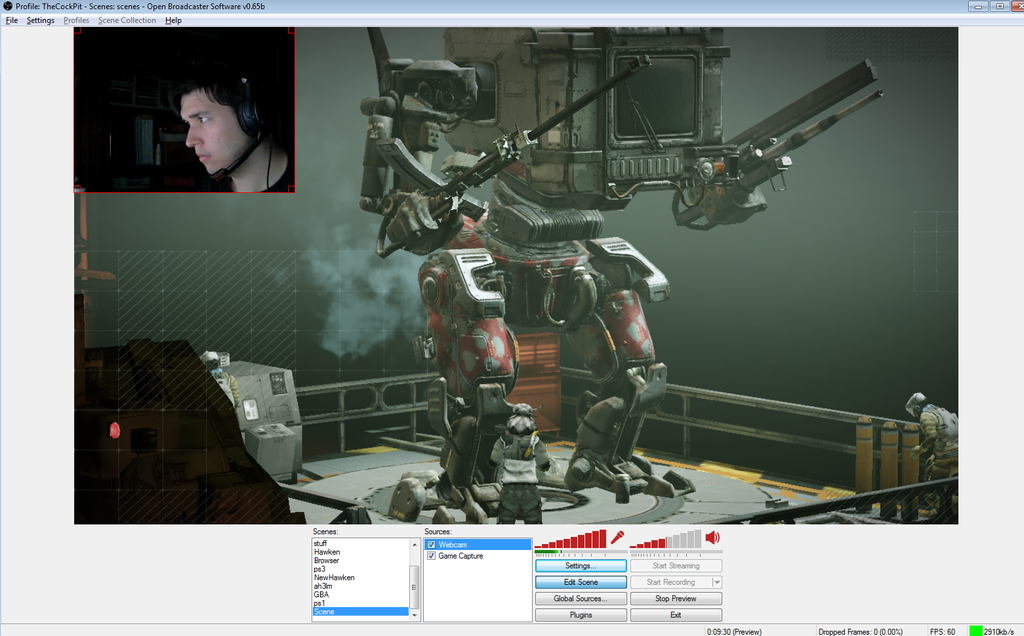
Now your scene will add the webcam at the upper left, you're going to want to move it, I suggest the bottom center since that'll be under your health and non-intrusive to your viewers.
Click Preview Stream
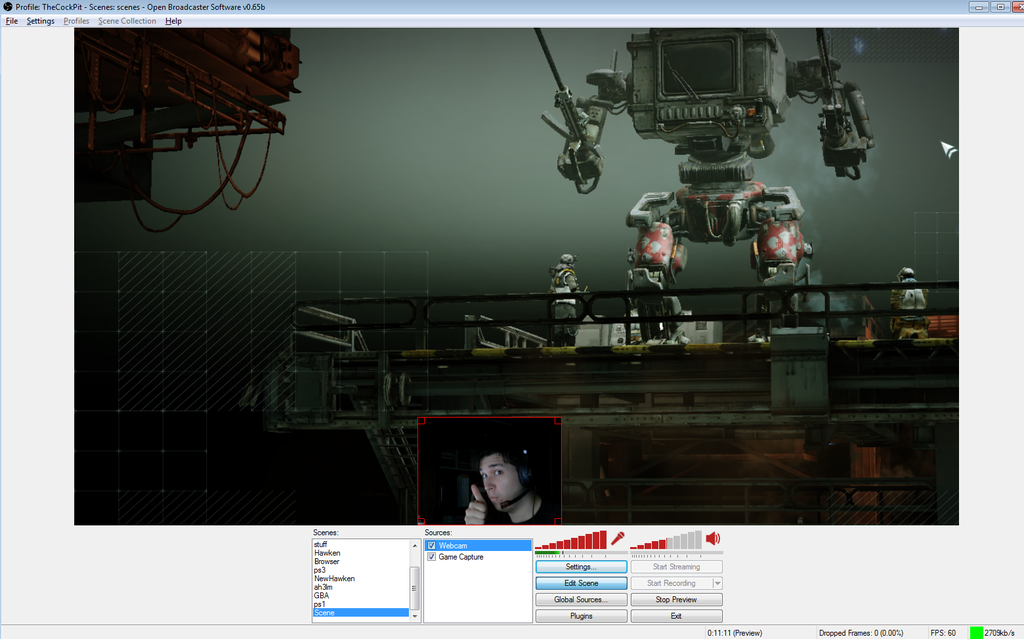
Click Edit Scene, select your webcam on the Sources and then you'll see a red box around it, you can make it smaller/bigger, and move it. So I'll make mine a little smaller and move it.
My result:
Click Stop Preview
Other sources
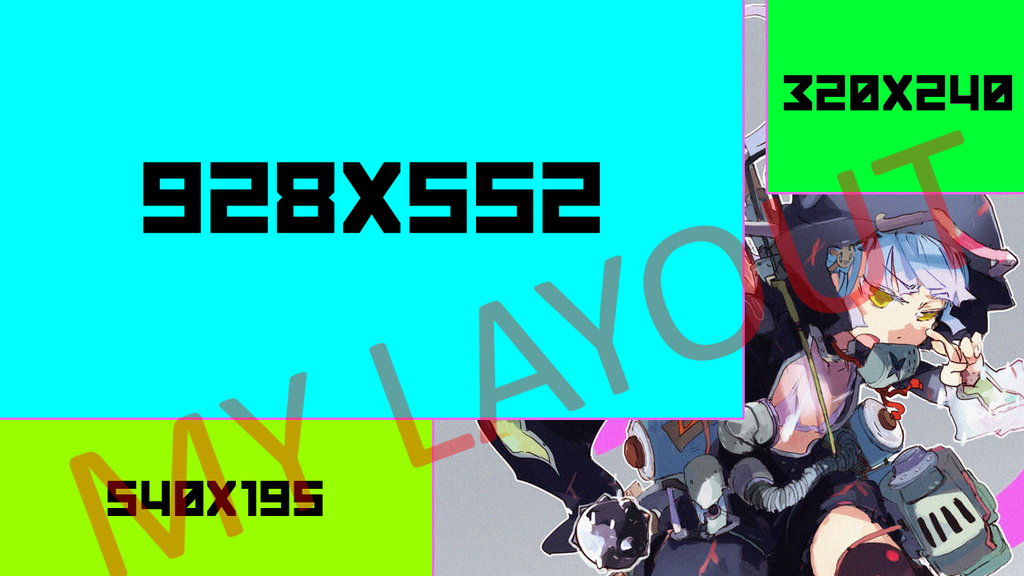
If you want, you can figure out how to add other things like text and images through the Sources window pretty easily. Some people like to make a layout for their stream to hold each element in a certain spot (I used to!) which you should put those on the bottom and put everything on top of it.
For example I used to use this as my layout.
You're ready to start! Go ahead and hit Start streaming and have fun!
Edited by Rei, 21 March 2015 - 12:33 AM.
 Sign In
 Create Account



 Back to top


